
Sound Sensor Challenges
Light sensors are used to detect the level of brightness and produce an output signal representative of the amount of light detected. The LEDs on the micro:bit board can also act as an input by detecting ambient light. MakeCode includes a "light level" block in the 'Input' category that reads the light value detected by the LED screen. This value ranges from 0 (dark) to 255 (bright).
Challenge #1: Showing light level
Objective.
Code description.
The proposal is to create three different programs, each triggered by pressing a specific button or combination of buttons.
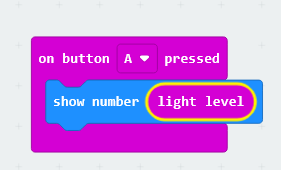
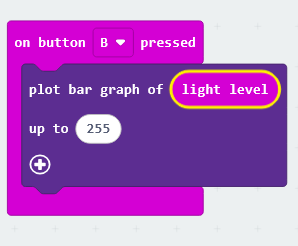
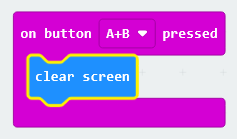
Finally, pressing buttons A and B simultaneously will be used to clear and turn off the LED display.
Extra activity
Create code that turns on all the LEDs on the micro:bit panel when button A is pressed and turns them off when button B is pressed, but prevents them from turning on if the light sensor value is greater than 175.
Challenge #2: Modify the brightness of the LEDs
Most mobile phones include the ability to adjust screen brightness to suit the ambient light.
Objective
Design a program that allows the brightness of the LEDs to be adjusted: pressing button A increases the brightness, while pressing button B decreases it. Pressing both A and B sets the brightness to an intermediate value (128).
Code description.
To start the program, a variable named “brightness” will be defined. In the Variables category, you can create a new variable or rename the default one.
An initial value of 128 will be set for the created variable.
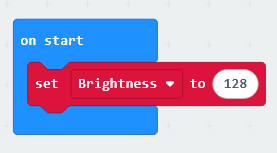
It is proposed to use increments of 32 units to demonstrate the change in LED brightness, though any other value may be used.
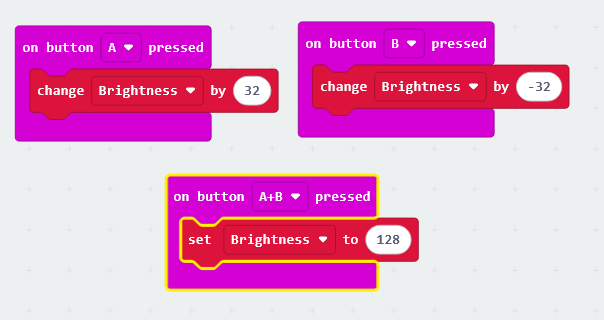
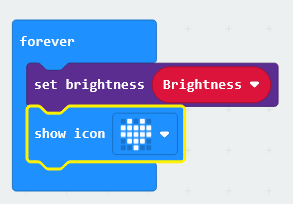
Finally, we need to display an icon on the LED panel that shows changes in the LED brightness. The “brightness” variable must be used as the value for the “set brightness” block.
Challenge #3: Twilight Switch
When the light intensity falls below a predetermined, pre-set illumination level, the twilight switch turns on the lighting. Conversely, if the light intensity exceeds the preset level, the switches turn off the lighting.
Objective
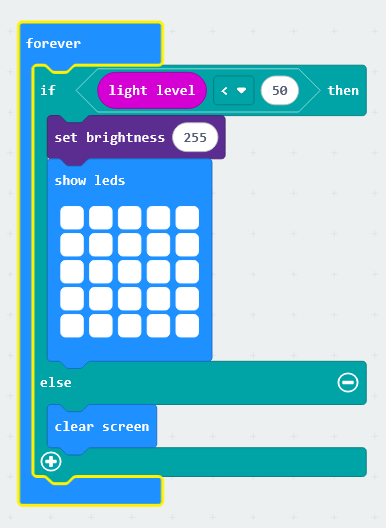
Create a program that measures the current light level using the micro:bit's light sensor. Then, check if the value is below 50; if so, turn on all the LEDs on the board at maximum intensity.
Code description.
We suggest using the ‘forever’ event, which is in the ‘Basic’ category. This block allows the code entered to be executed during all the program. An "if... then... else" condition will be introduced to check whether the value is above or below the threshold—set to 50 in this instance. If the value "light level", from the 'Input' category, is less than 50, the LED intensity will be set to the maximum using the "set brightness to 255" block in the 'Led' category. If the value is greater than 50, the "clear screen" block will be used to turn off all the LEDs.
The code would look like this; its operation can be verified by varying the intensity in the board simulator.
Information extracted and translated from catedu.
No comments to display
No comments to display