Output
Normally we program because we want to obtain a result. This result is what we usually call OUTPUT of the program, although everything that the program shows to the user receives the same name.
When you are taking your first steps in programming, you usually start by creating the Hello World program, which is a program that displays that message on the screen. This simple program will help us become familiar with the outputs. Let's see how to do it step by step:
Steps 1 and 2: Analysis and flow chart of the Hello world program
According to what was seen in the first section, it would have the following elements:
- Start and end of the algorithm.
- A single output that would display that message.
SOLUTION:
Steps 3, 4 y 5: Coding, compilation and checking of the Hello world program with Scratch
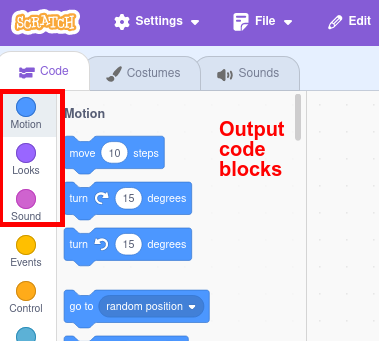
The code blocks associated with the outputs are:
- Motion: produce movement in the selected sprite.
- Looks: produce some change in the appearance of the selected sprite.
- Sound: produce some sound associated with the selected sprite.
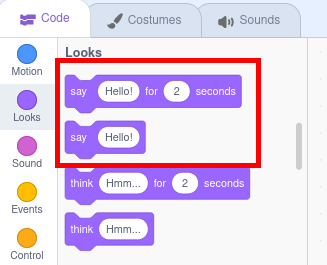
Specifically, for our program we are interested in a couple of Looks blocks:
These blocks will show the sprite saying a message, in the first case for a certain time, in the second indefinitely.
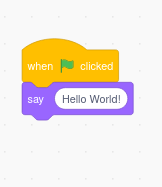
Finally we will have to mark the beginning and end of the program. In Scratch, the start is marked by clicking on the green flag at the top of the program window, and that order is found in the Events block. The ending is not specified.
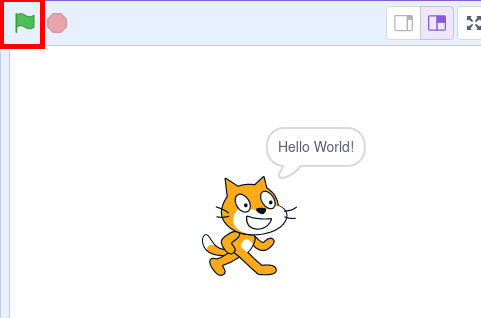
When you click on the green flag, the sprite to which we have assigned the code will come out saying that message.
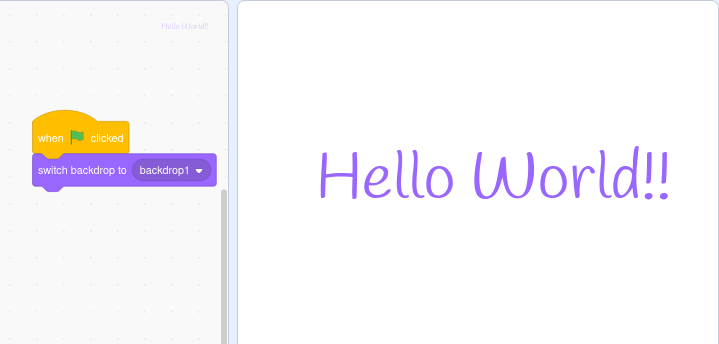
In this case we have associated the OUTPUT to a sprite. In the same way we could have associated it with the stage, simply changing the backdrop to one that included that message, in the Looks block, and which we would have previously had to have created.
Steps 3, 4 y 5: Coding, compilation and checking of the Hello world program with PSeInt
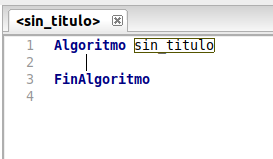
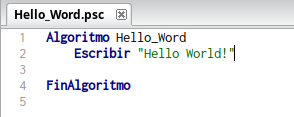
PSeInt already starts by default with the beginning and end of the algorithm written:
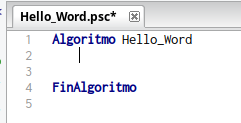
First, we change the name of the algorithm:
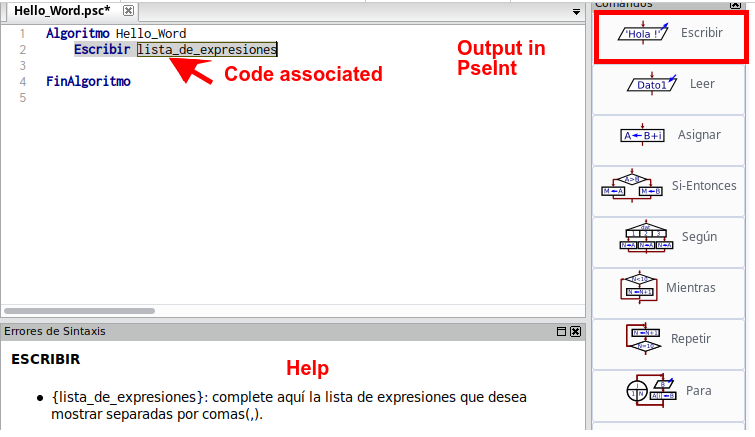
And finally we must find the command to display an output on the screen. This is done by the Escribir command.
If we click on Escribir, the code is automatically added to the line of the program where we have the cursor, with the correct syntax, and it shows us at the bottom a help to complete the syntax.
In this case, since it is a sentence, we must write the text we want to show in quotes. It is also convenient to end the line with a semicolon to get used to it since that is how it is in most programming languages, although PSeInt, being pseudocode, is not so strict with this type of mistakes and will execute the program anyway.
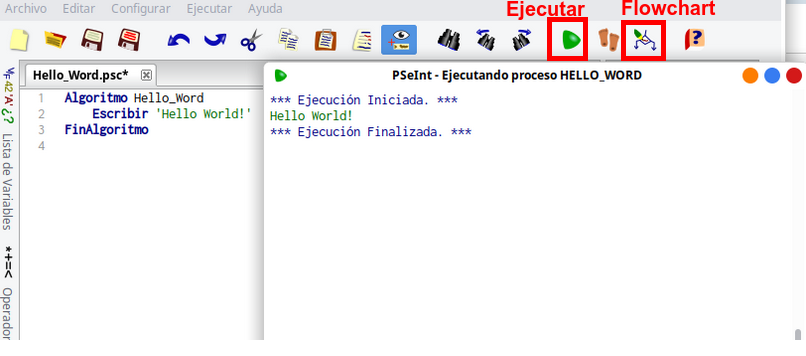
If we now want to see the correct operation of the program, we will click on the Ejecutar tool (the green triangle) and the program execution window or console will open where we will see the result. This statement performs compilation and checking in the same step. In more complex programs we can use the Ejecutar paso a paso tool, very useful for debugging errors.
If we want to check that our flowchart is correct, we will simply have to click on the Dibujar diagrama de flujo tool and we will see that it is the same one we had drawn at the beginning.
As you can see, PSeInt is a program that provides very simple alphanumeric outputs. However, its simplicity helps us understand the basic operation. Now we will make the comparison with Scratch, a program whose graphical power is much greater.
Steps 3, 4 y 5: Coding, compilation and checking of the Hello world program with Scratch
First of all, it should be noted that Scratch is a much more complex and complete program than PSeInt. To start in Scratch our programs have several objects executing code at the same time, and the Outputs it provides are much more complex and sophisticated.
The code blocks associated with the outputs are:
Motion:produce movement in the selected object.Looks:produce some change in the appearance of the selected object.Sound:produce some sound associated with the selected object.
Specifically, for our program we are going to be interested in a couple of Looks blocks:
These blocks will show the object saying a message, in the first case for a certain time, in the second indefinitely.
Finally we will have to mark the beginning and end of the program. In Scratch, the start is marked by clicking on the green flag at the top of the program window, and that order is found in the Events block. The ending is not specified.
When you click on the green flag, the object to which we have assigned the code will come out saying that message.
In this case we have associated the OUTPUT to an object/character. In the same way we could have associated it with the stage, simply changing the background to one that included that message, in the Looks block, and which we would have previously had to have created.


