
Light Sensor Challenges
TheLight temperaturesensors sensorare integratedused into micro:bitto detect the level of brightness and produce an output signal representative of the amount of light detected. The LEDs on the micro:bit board can also act as an input by detecting ambient temperaturelight. MakeCode includes a "light level" block in Celsiusthe degrees.'Input' category that reads the light value detected by the LED screen. This value ranges from 0 (dark) to 255 (bright).
Challenge #1: DigitalShowing Thermometerlight level
Objective.
Code description.
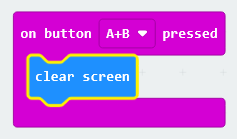
The proposal is anto instrumentcreate three different programs, each triggered by pressing a specific button or combination of buttons.
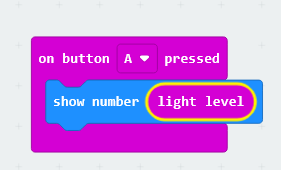
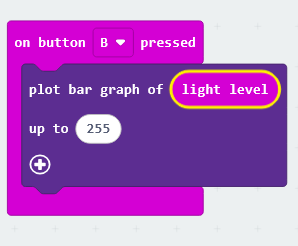
Finally, pressing buttons A and B simultaneously will be used to measureclear temperature.and Theturn mostoff commonthe typeLED consistsdisplay.
Extra activity
Create code that turns on all the LEDs on the micro:bit panel when button A is pressed and turns them off when button B is pressed, but prevents them from turning on if the light sensor value is greater than 175.
Challenge #2: Twilight Switch
When the light intensity falls below a sealedpredetermined, glasspre-set capillaryillumination tube ending in a small reservoir containing a certain amount of mercury or alcohol. This mercury or alcohol expands whenlevel, the temperaturetwilight risesswitch andturns contracts when it falls, andon the resultinglighting. volumeConversely, changes are read on a graduated scale.
Digital thermometers use transducer devices and electronic circuits to convertif the smalllight voltageintensity variations into numerical values, ultimately displayingexceeds the temperaturepreset onlevel, athe screen.switches turn off the lighting.
Objective.
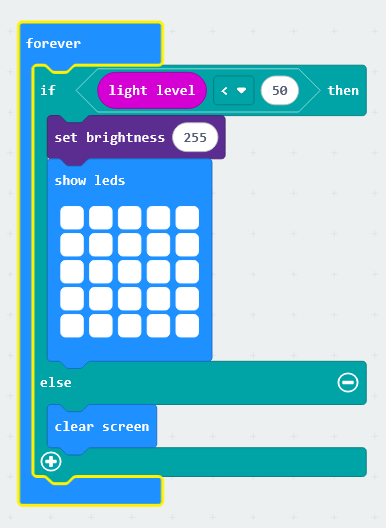
DisplayCreate ona program that measures the LEDcurrent panellight thelevel temperature detected by the temperature sensor integrated intousing the micro:BIT.bit's light sensor. Then, check if the value is below 50; if so, turn on all the LEDs on the board at maximum intensity.
Code description.
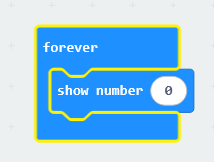
We suggest using the ‘forever’ event, which is in the ‘Basic’ category. This block allows the code entered to be executed during all the program.

Add"if... then... else" condition will be introduced to check whether the value is above or below the threshold—set to 50 in this instance. If the value "showlight number"level", block,from locatedthe 'Input' category, is less than 50, the LED intensity will be set to the maximum using the "set brightness to 255" block in the 'BasicLed' category. This block displays the entered number on the LED screen, scrolling it if it has more than one digit.
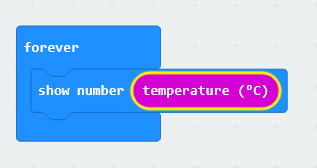
Replace the number “0” with the value obtained from the temperature sensor. This block is located in the Input category.
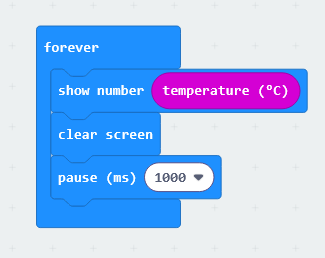
Next, the screen is cleared and a 1000 ms pause is introduced. The program then looks like this:
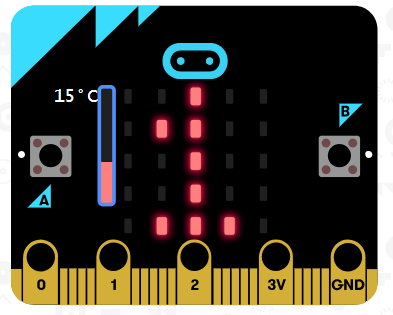
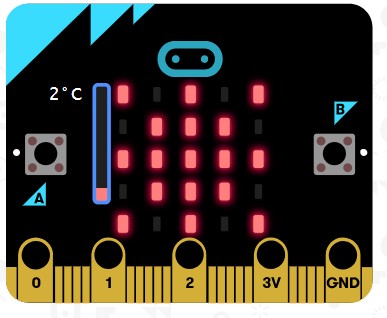
A vertical bar will appear in the simulator allowing the temperature to be adjusted; the selected temperature is the one displayed on the LED panel.
Extra exercise.
Create a program that displays the temperature in degrees Celsius when button A is pressed, and displays the temperature in degrees Fahrenheit when button B is pressed.
Challenge #2: Warning: patches of ice.
Most cars feature a snowflake-shaped warning light on the dashboard, next to the outside temperature display, to alert the driver to the potential presence of ice patches on the road. This light typically illuminates when the temperature drops below 3 degrees Celsius.
Objective.
Display a snowflake icon on the micro:bit's LED panel when the temperature is below 3 degrees.
Code description.
To start the program, it is proposed to use the "forever" event. Next, the "if... then" logical operator, found in the Logic section, must be added. This block checks whether a condition is met; if so, it executes the entered instructions.
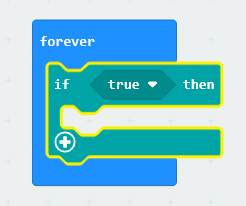
To check if the temperature is below 3 degrees Celsius, the operator that returns "true" whenever 3 is greater than the value reported by the temperature sensor will be used. The block is located in the Logic category.
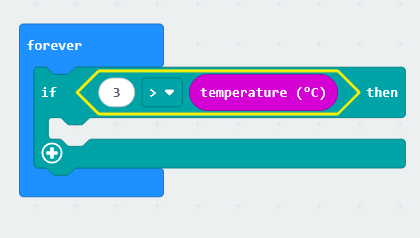
To display a snowflake-shaped icon, the "show LED" block will be used; the "clear screen" block must also be added so that the LED panel does not remain lit when the temperature rises above 3°C, but with a delay to make sure that the signal is visible.
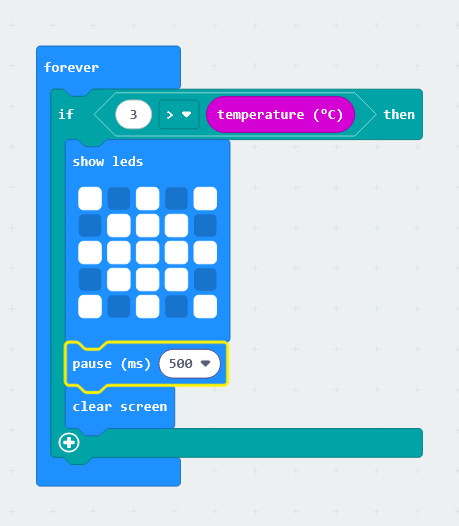
Once the code is finished, the ice symbol will appear when the temperature drops below 3°C.
Extra exercise.
Add an audible alert when the temperature drops below 3 degrees Celsius.
Challenge #3: Optimal refrigerator temperature
The optimal temperature for a refrigerator is 7°C, while a freezer's temperature should be around -18°C. Some refrigerators feature an audible alarm that activates when the temperature is not optimal.
Objective.
Display the refrigerator temperature on the micro:bit's LED panel and activate an alarm when the temperature exceeds 7°C.
Code description.
This challenge incorporates a speaker as an external actuator. One terminal will be connected to GND and the other to PIN 0.
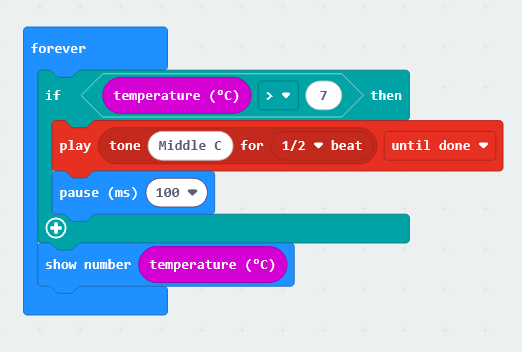
To start the program, the "forever" block will be used. Inside it, the "if-then" condition will be placed. The condition to check will be: if the temperature is greater than 7 degrees.
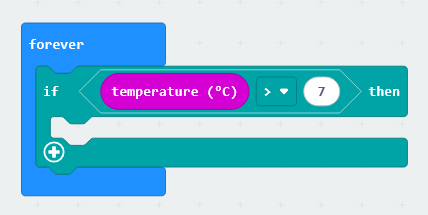
If the value is true,greater anthan alert50, tonethe "clear screen" block will play.be used to turn off all the LEDs.
The measuredcode temperaturewould islook alsolike displayed.
In the simulator, the temperatureoperation can be variedverified toby verifyvarying the correctintensity operation ofin the program.board simulator.
Information extracted and translated from catedu.