Electronics and control
This book has been created by Ana Mª López Floría (2024)
Electronics
What is electronics?
In an electrical circuit the current flows through the conductors and components naturally, having the current a value that depends on the components connected in the circuit.

In an electronic circuit, a control is exercised over the flow of the electric current.
But this is not new, just put a switch to let flow or not the current through a light bulb. (In this way, we would be “controlling” the flow of current through the bulb).
However, the most important difference lies in the “how” this current flow is controlled. In an electronics circuit, an electric current flow is controlled by another electrical signal, this being another electric current flow or a fixed voltage.
In other words:
In an electronic circuit … electricity is able to control electricity.
Information extracted from here
Electronic components
Electronic components can be classified in:
- Active components: usually can inject power into a circuit. They are made of semiconductors. E.g: Diodes, transistors.
- Passive components: cannot introduce net energy into the circuit. E.g: Resistors, capacitors
For a circuit to be properly called “electronic circuit” it must contain at least one active element.
Passive components
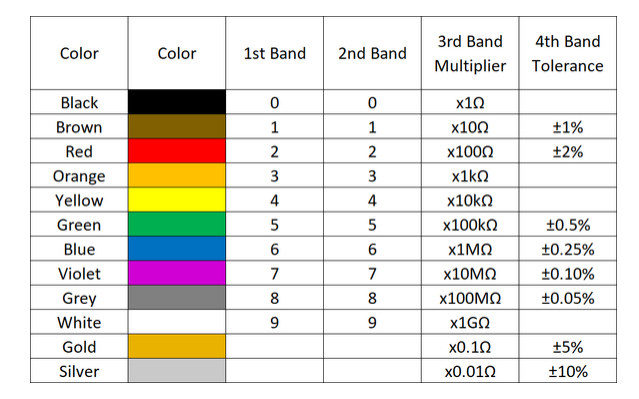
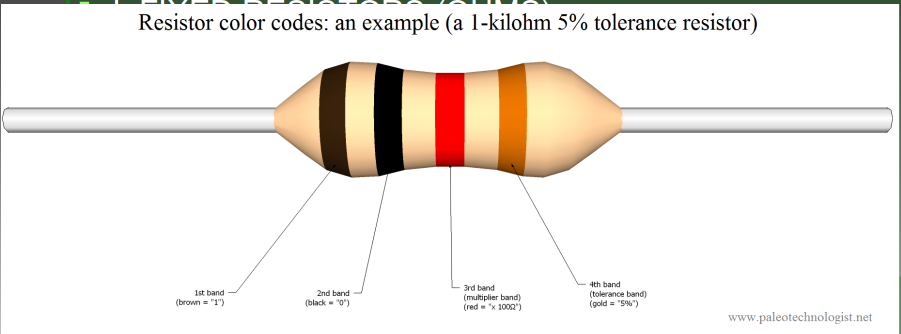
Fixed resistors
- They impede the flow of electric current
- There is a colour code to know their value
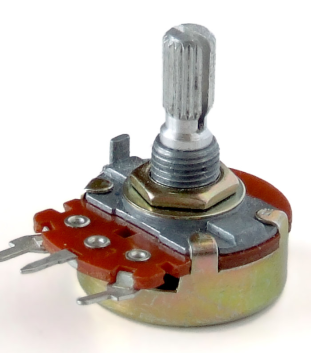
Variable resistors
- Potentiometer: A potentiometer is a three-terminal resistor with a sliding or rotating contact that forms an adjustable voltage divider.
- Thermistor: semiconductor type of resistor whose resistance is strongly dependent on temperature. They can be
- Negative-temperature-coefficient (NTC): thermistors have less resistance at higher temperatures
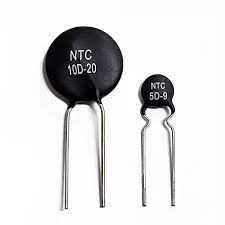
-
-
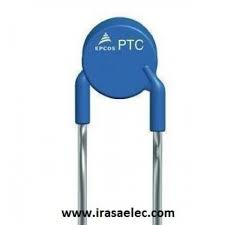
- Positive-temperature-coefficient (PTC): thermistors have more resistance at higher temperatures
-
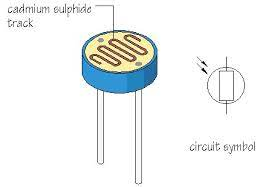
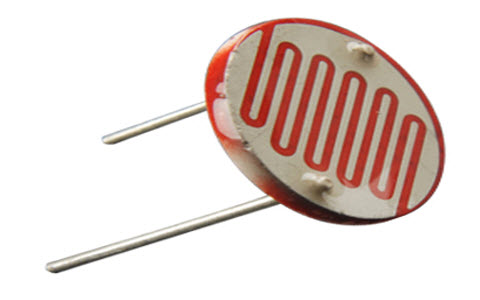
- Light Dependent Resistors (LDR): passive component that decreases resistance with respect to receiving luminosity on the component's sensitive surface
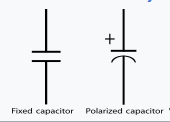
Capacitors
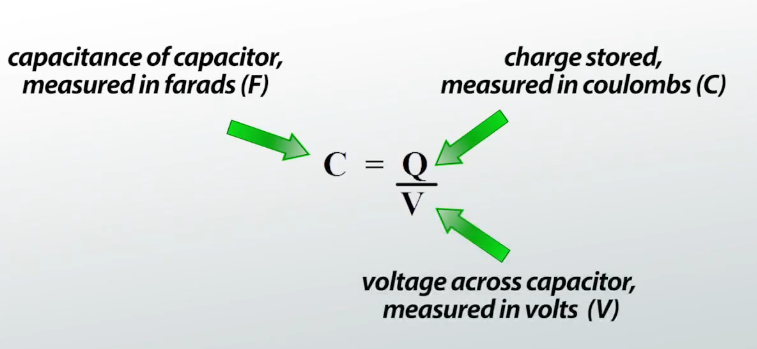
Device that stores electrical energy by accumulating electric charges on two closely spaced surfaces that are insulated from each other.

The property of a capacitor is the capacitance (C) that is defined as the amount of charge that can be stored at a given voltage. It is measured in Farads (F)
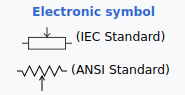
Electronic symbol
Active components
They are made up of semiconductor materials, whose properties allow to introduce "control" in the circuit.
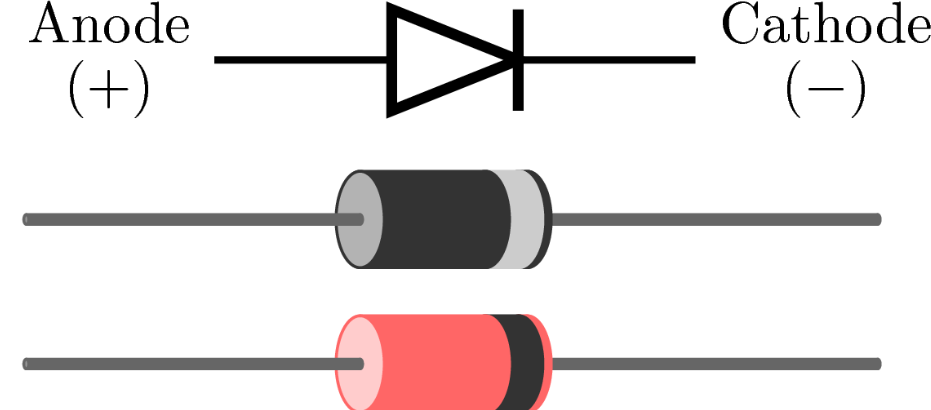
Diodes
Devices that allow current to flow just in one direction.
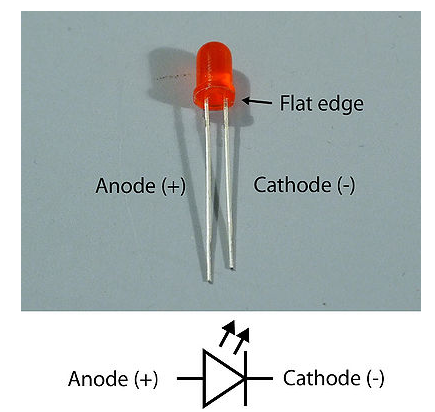
The most known are LED's: Light Emitting Diode
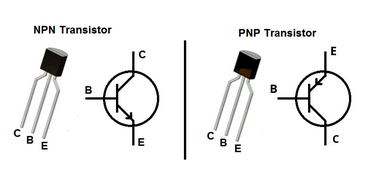
Transistors
It is a semiconductor device used to amplify or switch electrical signals and power. It is composed of semiconductor material, usually with at least three terminals for connection to an electronic circuit. A voltage or current applied to one of the transistor's terminals (Base) controls the current through another pair of terminals (Collector and Emitter)
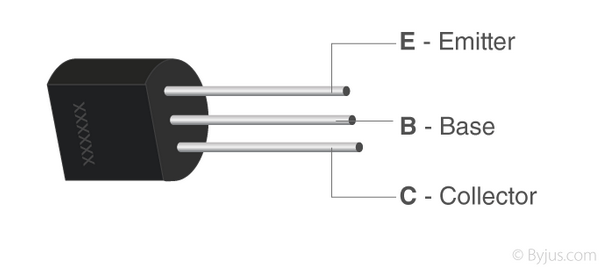
There are two main types of transistors depending on the sense of the controlled current: NPN and PNP
Information and images extracted from:
- https://en.wikipedia.org/wiki/Electronic_component
- https://en.wikipedia.org/wiki/Capacitor
- https://study.com/academy/lesson/capacitance-units-formula.html
- http://cmra.rec.ri.cmu.edu/products/electronicsv2/basic_components/what_is_an_led/1/vid1.html
- https://simple.wikipedia.org/wiki/Transistor
- https://byjus.com/jee/transistor/
- https://shoptransmitter.com/blog/what-is-the-difference-between-pnp-and-npn/
Control systems
Control systems and robotics
An automated process continuously repeats the action that it is designed to carry out. A set of interconnected elements which allow the automation of a process is called a control system.
Some automated systems only carry out the same action. Other can modify this action by changing their programs. They are intelligent control systems.
Intelligent control systems work in a similar way to a human being. That means, we receive information from the outside world thanks to our senses (sight, hearing, smell, taste and touch) our brain processes this information and through our muscles or our voice we perform different actions. Intelligent control systems: they receive information from the environment thanks to different sensors, they process this information in controller boards (like Arduino) and give a response using different actuators.
A robot is an intelligent automated system capable of:
- sensing its environment,
- carrying out operations to make decisions
- performing actions in the real world.
So the main elements in every robot, as we learned in programming, will be:
- Input: information received by sensors
- Process: to perform operations/ make decisions with this input. This is made by the controller board.
- Output: response produced by actuators that can be mechanical, electric, pneumatic....
The task of a robot can be modified by changing its program.
Information extracted from:
Sensors and actuators
Sensors
A sensor is an object capable of detecting physical or chemical quantities and transforming them into electrical signals.
Depending on the type of the electrical signal produced they can be DIGITAL, ANALOG or DATA.
- DIGITAL: a digital sensor only has two states: activated/disactivated, ON/OFF, 1/0, High/Low. E.g: An electronic pushbutton is a kind of simple digital sensor with two possible states: pushed or not pushed.

- ANALOG: This sensor can provide a range of values, normally a variable voltage or current value, depending on the signal detected. E.g: A LDR decreases the value of its resistance with an increment of light detected.

- DATA: the sensor offers its information through a communication interface. E.g: DHT11 sensor measures temperature and humidity.
 There are lots of different sensors. To get further information click on here.


Actuators
An actuator is any device capable of performing actions in the physical world that we can control from a processor board (like Arduino)
Depending on the type of action produced they can be:
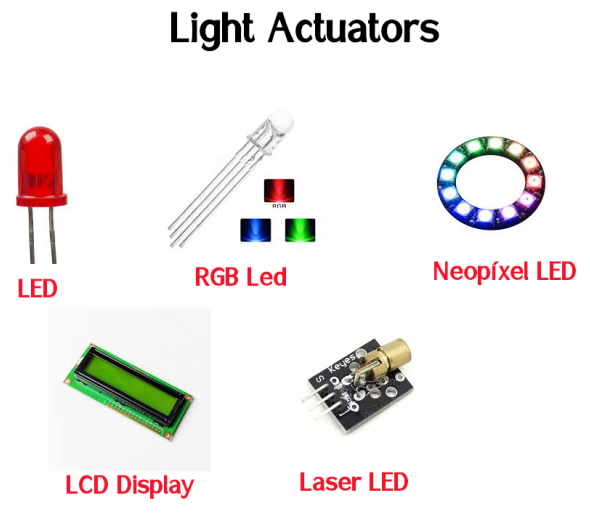
- LIGHT: The most common is the normal LED, but there is also RGB LED's, neopixel lightsaber, laser or LCD displays
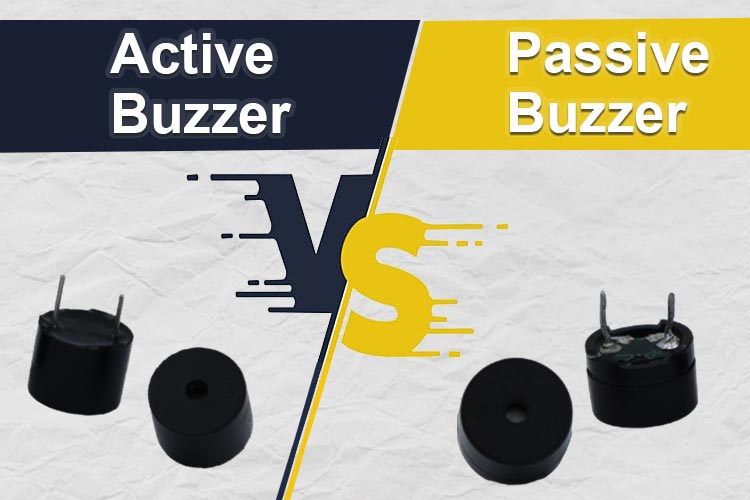
- SOUND: There are active and passive buzzers. Active buzzers play a tone of a frequency determined when they receive a digital "1" whereas a passive buzzer only plays the wave that receives.
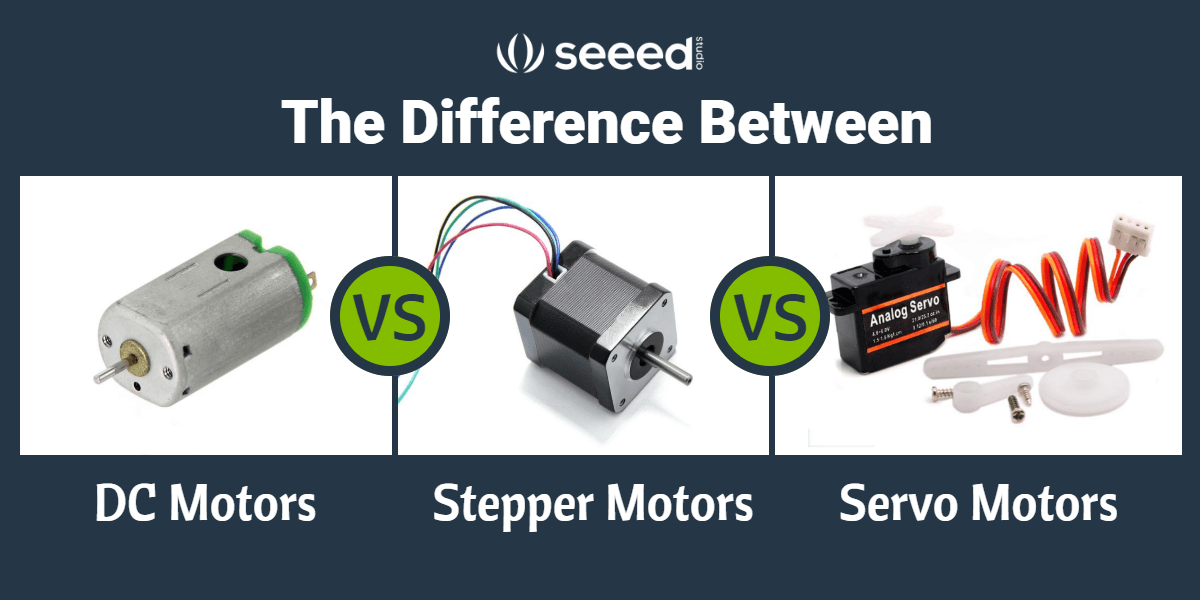
- MOTION: There are different types of motors depending on their properties. They usually need auxiliary elements to be controlled by processor boards, because of the voltage they require.
Imagina TDR Steam shield
We will use in our projects one shield called Imagina TDR Steam which is integrable into Arduino UNO, with a multitude of integrated sensors and actuators.
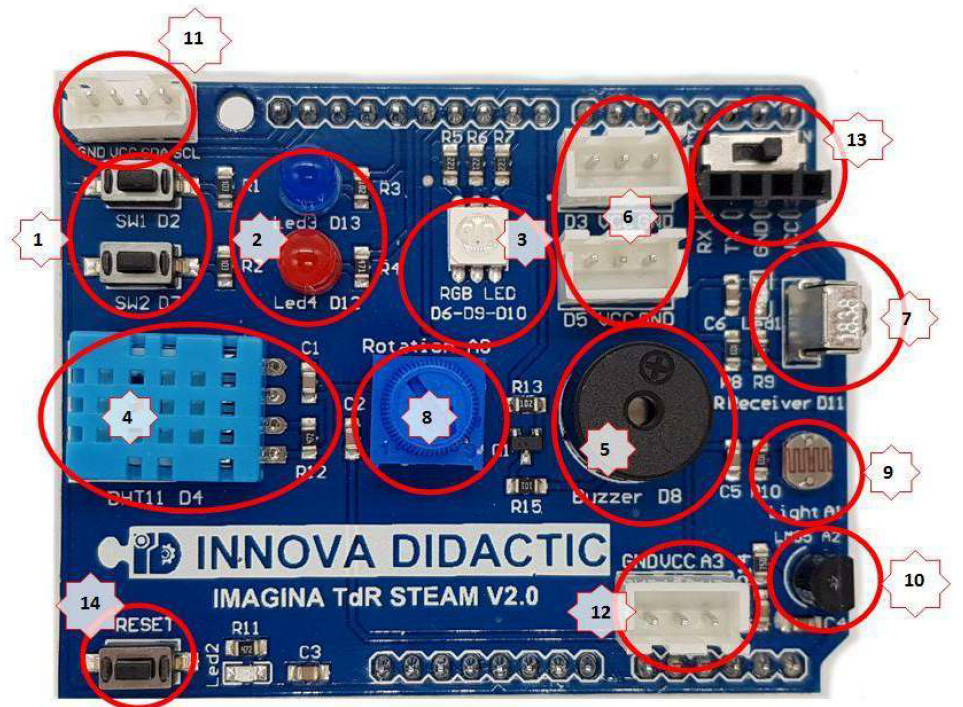
| Sensor/Actuator/Module |
|
| 1 |
Two pushbuttons (SW1, SW2) |
| 2 |
Two LEDS (Blue Led3 and Red Led4) |
| 3 |
Led RGB |
| 4 |
DHT11 Temperature and Humidity Sensor |
| 5 |
Buzzer |
| 6 |
Two digital outputs/inputs |
| 7 |
Infrared receiver module (IR) |
| 8 |
Rotary potentiometer module |
| 9 |
Light sensor (LDR) |
| 10 |
Temperature sensor (LM35) |
| 11 |
I2C Interface |
| 12 |
Analogic input |
| 13 |
Bluetooth and Wifi connection |
| 14 |
Reset button |
Controller: Arduino board
Arduino UNO is an electronic card that integrates a microcontroller and a set of input and ouptut connections pins that allow, through a certain program, to interact with the physical environment through electronic sensors and actuators. The sensors are connected to the input pins and the actuators to the output pins.

Information extracted and translated from here
Picture extracted from here
Programming Arduino board with Arduinoblocks
Arduinoblocks is a software created by the teacher Juanjo López. Thanks to its graphical environment, it facilitates the programming of Arduino boards at all levels.
It is not free software because the creator does not make public the code , but it can be used freely.

Challenges to create with Arduino and Imagina TDR (in Spanish)
Log in with Arduinoblocks as a Student and joining a project
To work with Arduinoblocks as a student there is a series of steps to follow:
- Connect the Arduino UNO board to the computer.
- Run the program Arduinoblocks connector.
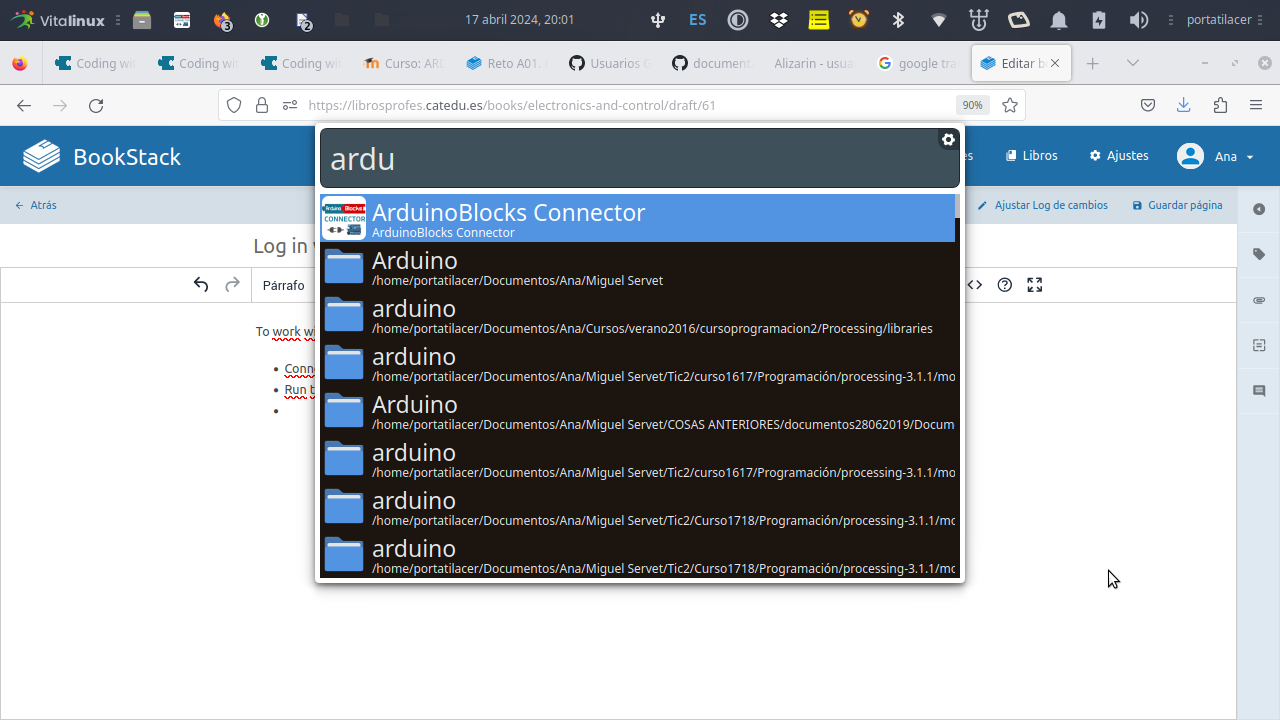
This program has to be open all the time we are using the Arduino.
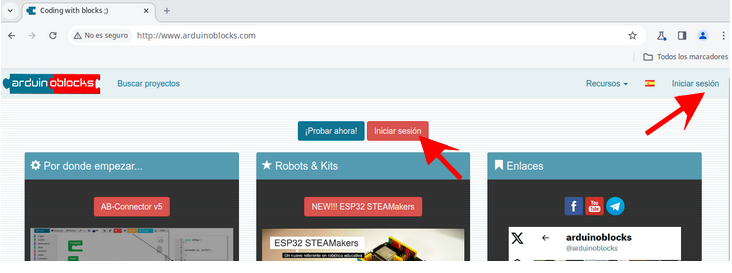
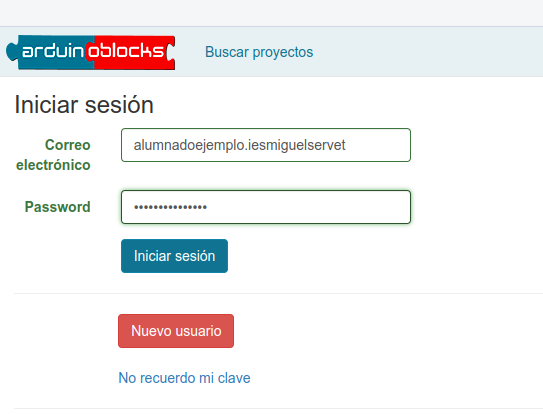
- The browser opens with the arduinoblocks site. Click on the Iniciar sesión button
- Introduce the keys your teacher has given to you. You will be able to change the password later in your profile.
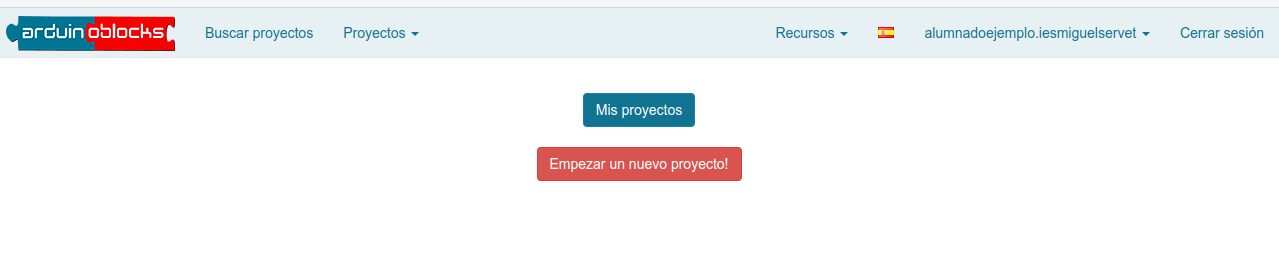
- Click on Empezar un nuevo proyecto
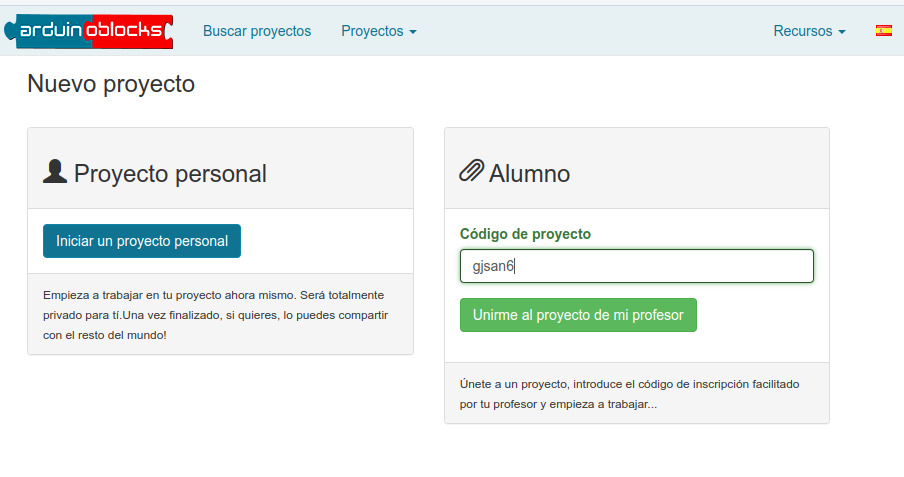
- Introduce the code of the project your teacher wil have provided to you and click on Unirme...
- So now you can start working on your project
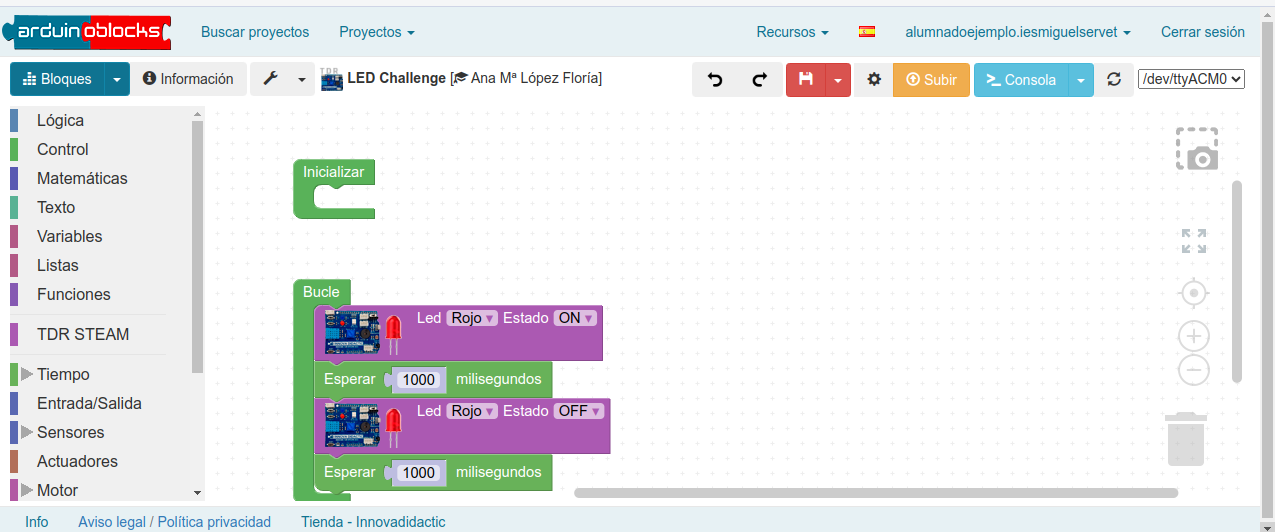
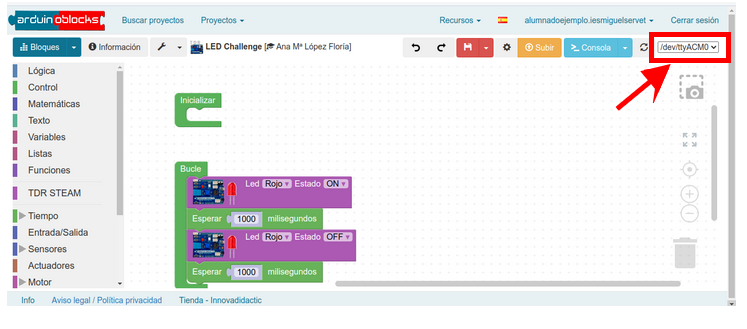
- First thing you have to do is checking that the Arduino Shield is well connected. You can see it at the top right of the screen. You have to see something similar to this:
- Then it is time to upload the program to the Arduino to check it works. To do that you have to click on the Subir button.
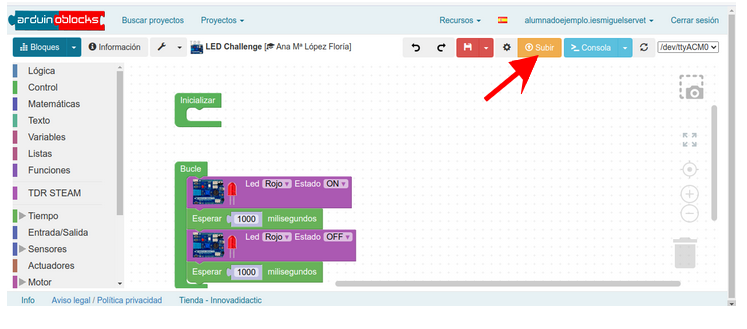
- You will see lights on the arduino shield and if everything is ok, a confirmation message.

- From this moment on, you will see the program working on the shield.